Table of Contents
- List of essentials
- Preparing the host
- Preparing the original ONU firmware
- Preparing the firmware
- Installing the firmware
- Verify
List of essentials
Available version of the firmware
The explanations and original github repository are available here
You will need the ability to use 7zip (windows or linux) to extract the firmware and a console able to connect and transfert using an ssh/scp command.
Preparing the host
Make sure you are on the ONU host machine. You will need an address on the 192.168.11.0/24 network. The ONU is accessible on the IP 192.168.11.1
You can test the connectivity by pinging the ONU.
ping 192.168.11.1
Preparing the original ONU firmware
Credentials
Web credentials (HTTP)
The original firmware login/password that come with the WAS-110 vary depending on the ONU version.
<= v1.0.20
| Username | Password |
|---|---|
| admin | QsCg@7249#5281 |
| user | user1234 |
v1.0.21+
| Username | Password |
|---|---|
| admin | BR#22729%635e9 |
| user | user1234 |
Shell credentials (SSH)
The original firmware login/password that come with the WAS-110 vary depending on the ONU version.
<= v1.0.20
| Username | Password |
|---|---|
| root | QpZm@4246#5753 |
v1.0.21+
The root password is undisclosed at this time, use the suggested exploit below to gain root privileges
Run the following command(s) to temporarily change the root password to root
curl -s -o null "http://192.168.11.1/cgi-bin/shortcut_telnet.cgi?%7B%20echo%20root%20%3B%20sleep%201%3B%20echo%20root%3B%20%7D%20%7C%20passwd%20root"
Configuring the ONU to accept SSH
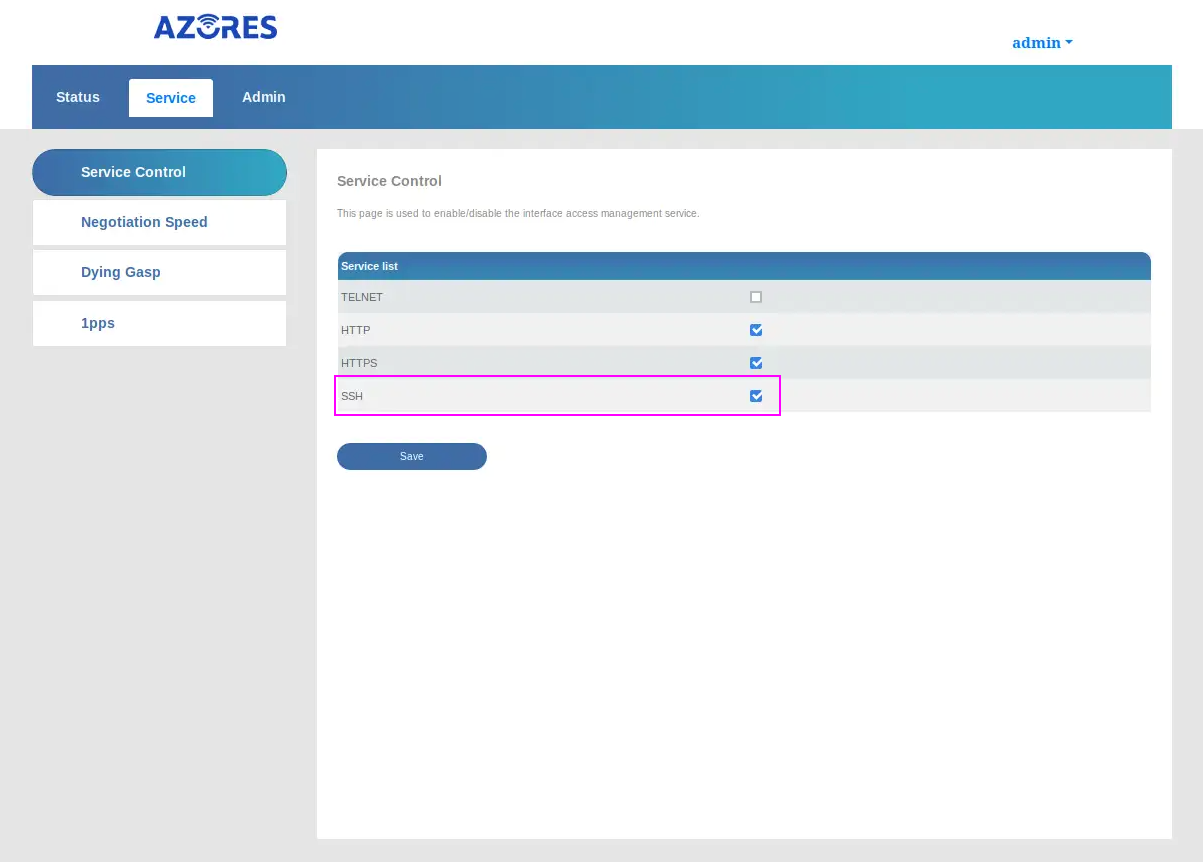
Navigate to the service controle panel to activate SSH. Use the admin credential above, matching your version, to login on the ONU.
Activate SSH and Save.

Preparing the firmware
Extract the firmware
windows
7z x WAS-110_8311_firmware_mod_<version>_basic.7z
linux
7z x WAS-110_8311_firmware_mod_<version>_basic.7z
Installing the firmware
In the folder where you extracted the community firmware, do the following.
windows
Prior to Windows 11 Build 22631.4391 (KB5044380) and Windows 10 Build 19045.5073 (KB5045594)
scp -oHostKeyAlgorithms=+ssh-rsa -oPubkeyAcceptedKeyTypes=+ssh-rsa local-upgrade.tar root@192.168.11.1:/tmp/
ssh -oHostKeyAlgorithms=+ssh-rsa -oPubkeyAcceptedKeyTypes=+ssh-rsa root@192.168.11.1 "tar xvf /tmp/local-upgrade.tar -C /tmp/ -- upgrade.sh && /tmp/upgrade.sh -y -r /tmp/local-upgrade.tar"
New Windows build
scp -O -oHostKeyAlgorithms=+ssh-rsa -oPubkeyAcceptedKeyTypes=+ssh-rsa local-upgrade.tar root@192.168.11.1:/tmp/
ssh -oHostKeyAlgorithms=+ssh-rsa -oPubkeyAcceptedKeyTypes=+ssh-rsa root@192.168.11.1 "tar xvf /tmp/local-upgrade.tar -C /tmp/ -- upgrade.sh && /tmp/upgrade.sh -y -r /tmp/local-upgrade.tar"
linux
scp -O -oHostKeyAlgorithms=+ssh-rsa -oPubkeyAcceptedKeyTypes=+ssh-rsa local-upgrade.tar root@192.168.11.1:/tmp/
ssh -oHostKeyAlgorithms=+ssh-rsa -oPubkeyAcceptedKeyTypes=+ssh-rsa root@192.168.11.1 'tar xvf /tmp/local-upgrade.tar -C /tmp/ -- upgrade.sh && /tmp/upgrade.sh -y -r /tmp/local-upgrade.tar'
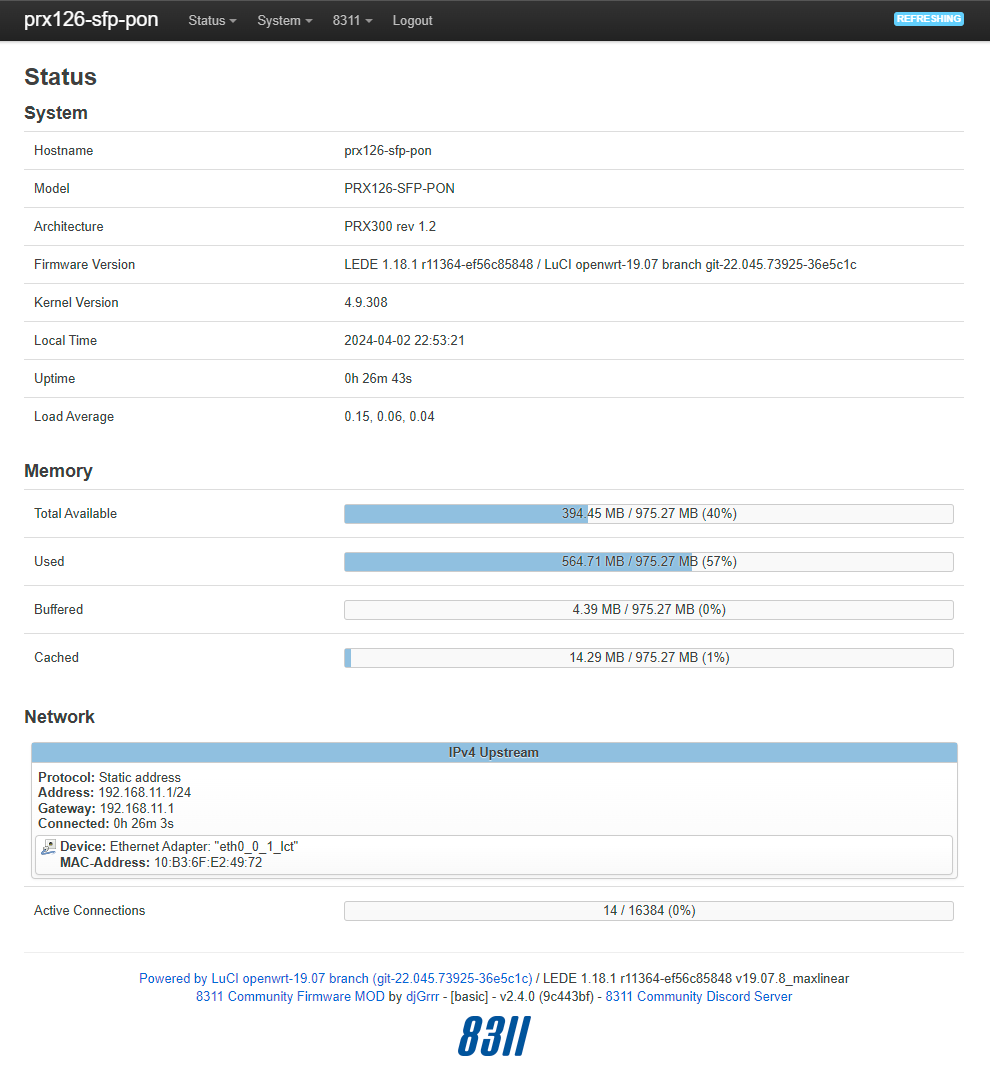
After a reboot of the ONU, you can verify that it as been upgraded to the community version.
Verify
Navigate to the ONU community interface. On the first connection, you will be asked to set a new root password. Please remember it, it will be important to configure the ONU later on.
